import http from 'http';
const port = порт_сервера;
import { TuyaContext } from '@tuya/tuya-connector-nodejs';
const context = new TuyaContext({
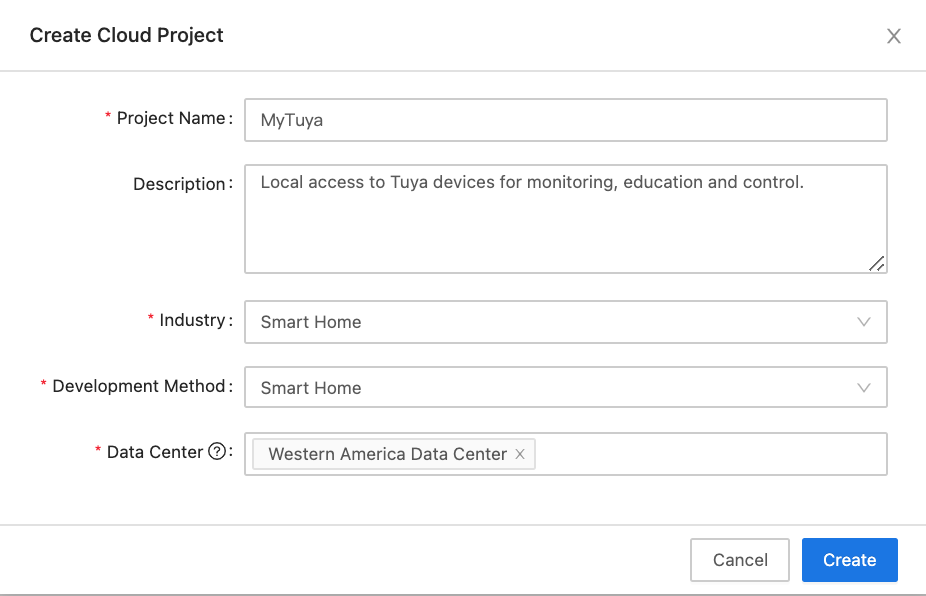
baseUrl: 'https://openapi.tuyaeu.com', // Central Europe Data Center
accessKey: 'Access ID/Client ID',
secretKey: 'Access Secret/Client Secret',
});
const server = http.createServer((req, res) => {
if (req.headers.authorization == 'авторизация_для_Кузи_в_Base64') {
res.statusCode = 200;
res.setHeader('Content-Type', 'text/plain');
var path = req.url.split('?')[0];
var device_id = req.url.split('?')[1];
var comm = path.split('/')[1];
var scene = path.split('/')[2];
if ( comm == 'on') {
if ( device_id == 'Device ID (лампа)' ) { // На лампе
if ( scene == '1' ) { // Сияние
var scene_data = {"scene_num":1,"scene_units":
[{"bright":0,"h":120,"s":1000,"temperature":0,
"unit_change_mode":"gradient","unit_gradient_duration":60,"unit_switch_duration":60,"v":1000},
{"bright":0,"h":240,"s":1000,"temperature":0,
"unit_change_mode":"gradient","unit_gradient_duration":60,"unit_switch_duration":60,"v":1000},
{"bright":0,"h":61,"s":1000,"temperature":0,"unit_change_mode":"gradient",
"unit_gradient_duration":60,"unit_switch_duration":60,"v":1000},
{"bright":0,"h":174,"s":1000,"temperature":0,"unit_change_mode":"gradient",
"unit_gradient_duration":60,"unit_switch_duration":60,"v":1000},
{"bright":0,"h":275,"s":1000,"temperature":0,"unit_change_mode":"gradient",
"unit_gradient_duration":60,"unit_switch_duration":60,"v":1000}]};
} else if ( scene == '2' ) { // Свеча
var scene_data = {"scene_num":2,"scene_units":
[{"bright":0,"h":0,"s":1000,"temperature":0,
"unit_change_mode":"gradient","unit_gradient_duration":78,"unit_switch_duration":78,"v":1000},
{"bright":0,"h":0,"s":1000,"temperature":0,
"unit_change_mode":"gradient","unit_gradient_duration":78,"unit_switch_duration":78,"v":370},
{"bright":0,"h":9,"s":1000,"temperature":0,
"unit_change_mode":"gradient","unit_gradient_duration":78,"unit_switch_duration":78,"v":640},
{"bright":0,"h":8,"s":1000,"temperature":0,
"unit_change_mode":"gradient","unit_gradient_duration":78,"unit_switch_duration":78,"v":570},
{"bright":0,"h":6,"s":1000,"temperature":0,
"unit_change_mode":"gradient","unit_gradient_duration":78,"unit_switch_duration":78,"v":820}]};
}}
context.request({
path: `/v1.0/iot-03/devices/${device_id}/commands`,
method: 'POST',
body: {"commands":[
{"code":"switch_led","value":true},
{"code":"work_mode","value":"scene"},
{"code":"scene_data_v2","value":scene_data}
]}
});
res.end('{"value":"1"}');
}
else if ( comm == 'off') {
context.request({
path: `/v1.0/iot-03/devices/${device_id}/commands`,
method: 'POST',
body: {"commands":[{"code":"switch_led","value":false}]}
});
res.end('{"value":"0"}');
}
else if ( comm == 'status') {
context.request({
path: `/v1.0/iot-03/devices/${device_id}/status`,
method: 'GET'
}).then((commands) => {
if (commands.result) {
var stat = [];
commands.result.forEach((item) => {
stat[item.code] = item.value;
});
var scene_data = JSON.parse(stat['scene_data_v2'])
if (stat['switch_led'] == true && stat['work_mode'] == 'scene' && scene_data.scene_num == scene) {
res.end('{"value":"1","status":'+JSON.stringify(commands)+'}');
} else {
res.end('{"value":"0","status":'+JSON.stringify(commands)+'}');
}} else { res.end(JSON.stringify(commands)); }
});
} else { res.end('{"value":"request '+url+' is unknown"}'); }
} else {
res.statusCode = 401;
res.setHeader('WWW-Authenticate', 'Basic realm="node.js"');
res.end('Unauthorized');
}});
server.listen(port,() => {
console.log('server http tuya is running');
})
|